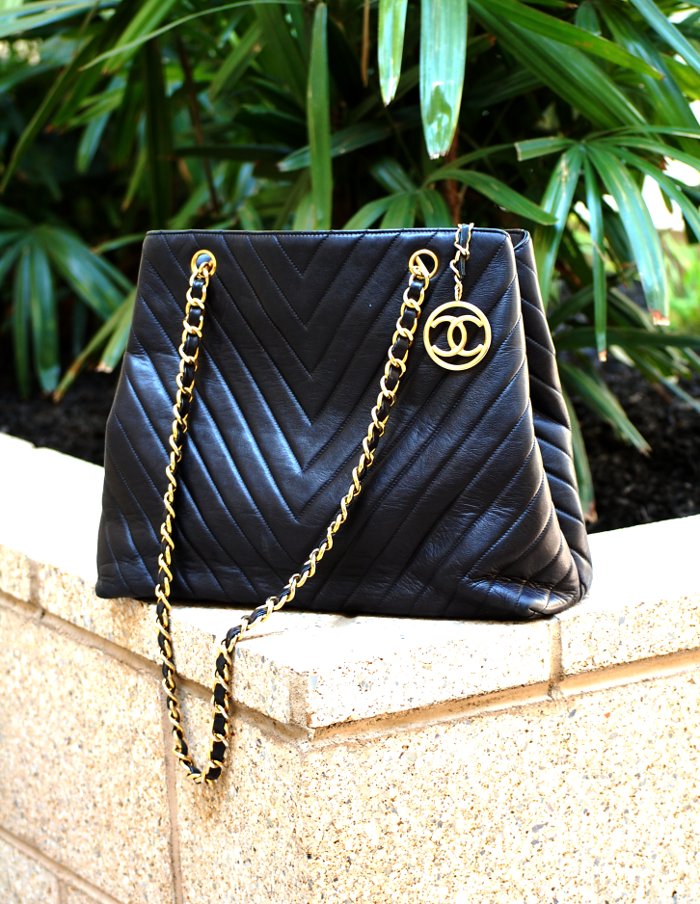
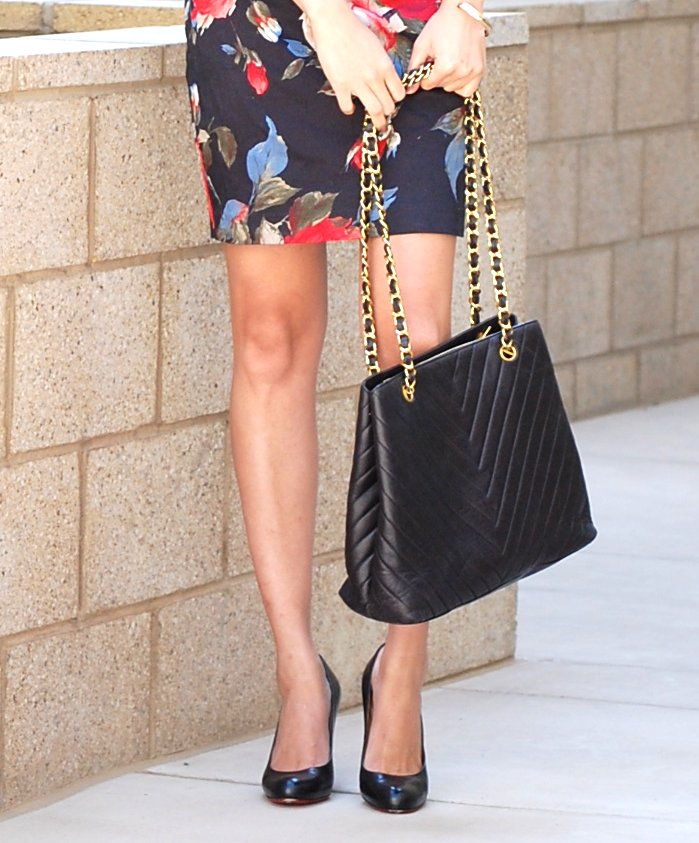
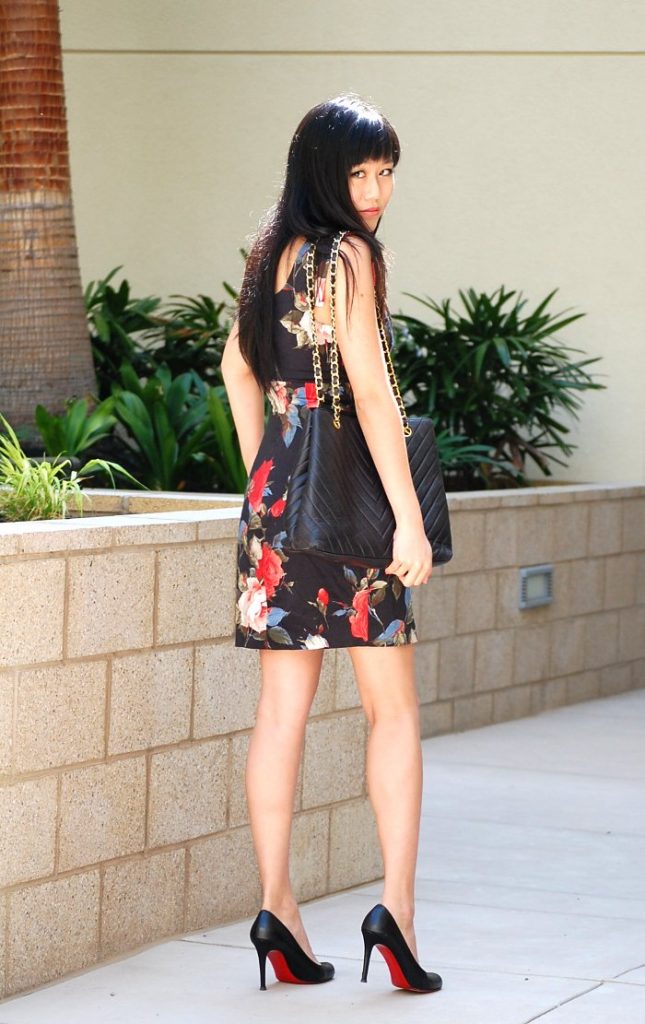
Can you wear Chanel and Christian Louboutin to the office? I say, "Absolutely yes!" Come look at my work outfit that incorporates a gorgeous large lambskin Chanel tote, and black Christian Louboutin simple pumps!
Ultimately, it's up to you to decide if designer clothing and handbags are too pretentious for the workplace. And, it depends on your job!
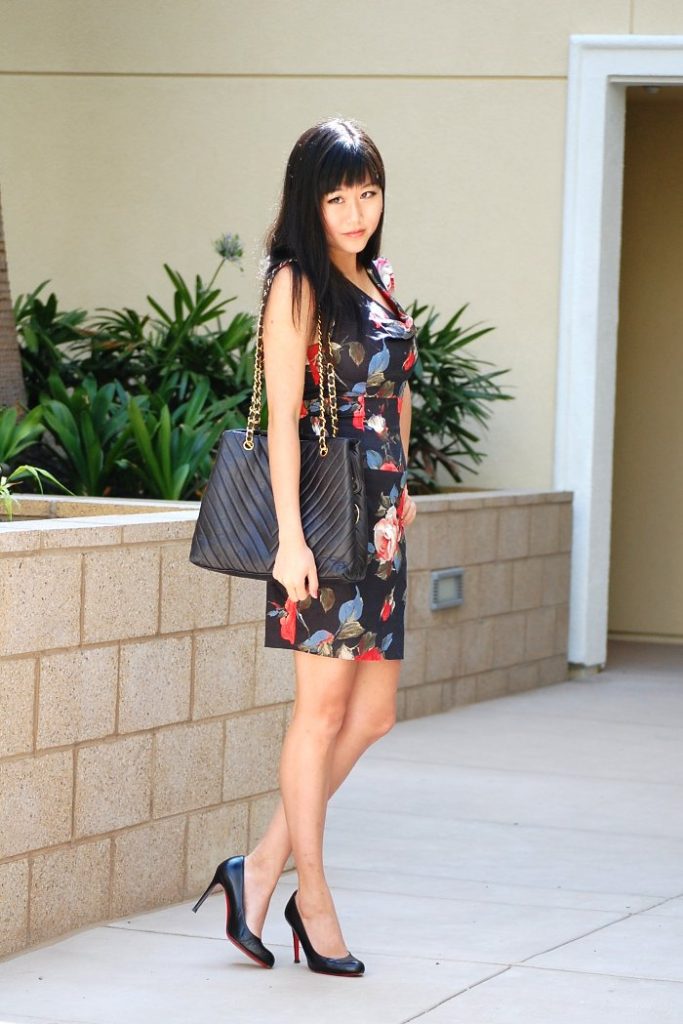
But, this post just demonstrates how professional and elegant Christian Louboutin and Chanel can be in the office.
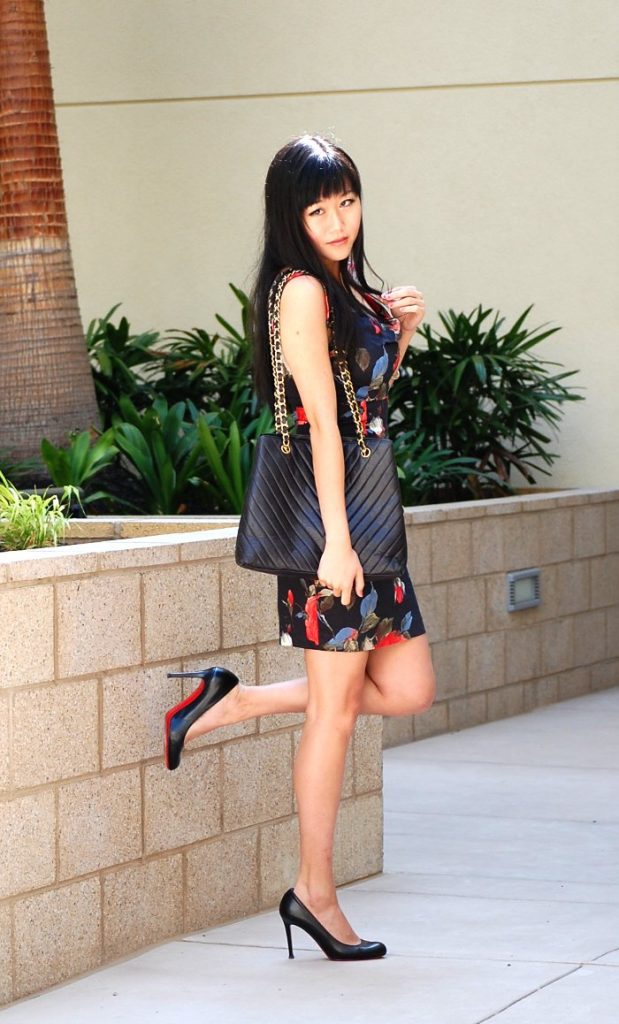
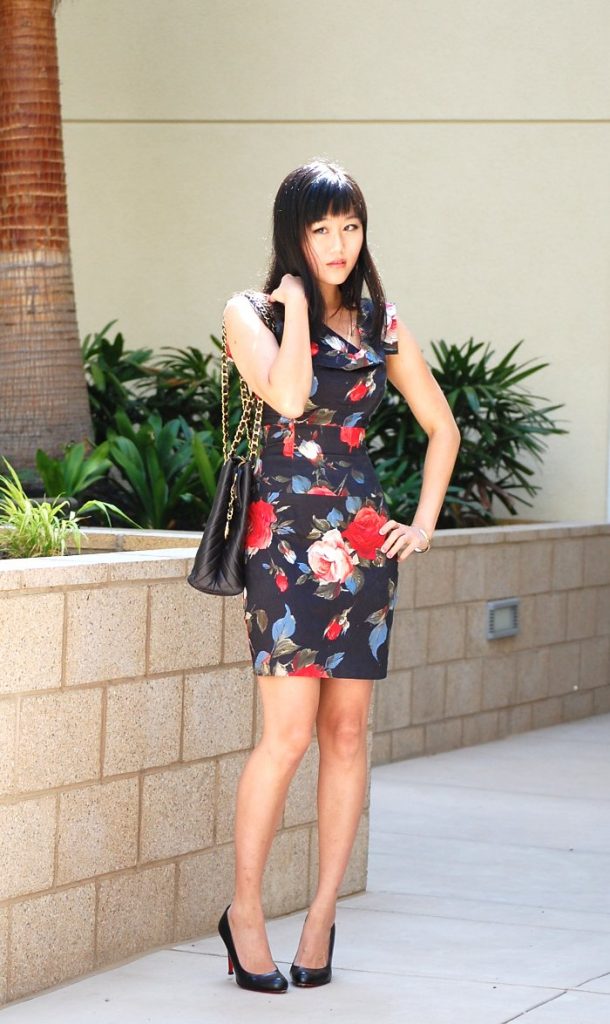
wearing: Black Halo Jackie O mini dress (here), Chanel Tote bag, and Christian Louboutin Simple pumps (here)
So, would you wear Chanel or Christian Louboutin to your workplace? Keep in mind that even powerful Marissa Mayer (CEO of Yahoo!) has been seen in her attention-grabbing Louboutins at work!
If you ladies liked my first strassing project, you'll be blown away with the results of the second! These shoes have some serious sparkle impact!
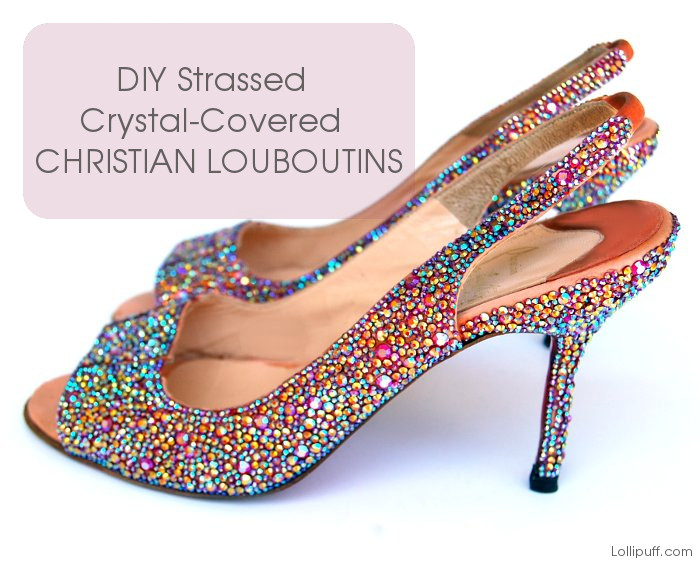
DIY: Siam AB Crystal Strassed Christian Louboutin
By Bebefuzz
If you ladies liked my first strassing project, you'll be blown away with the results of the second! These shoes have some serious sparkle impact!


Pictures During the Strassing Process:
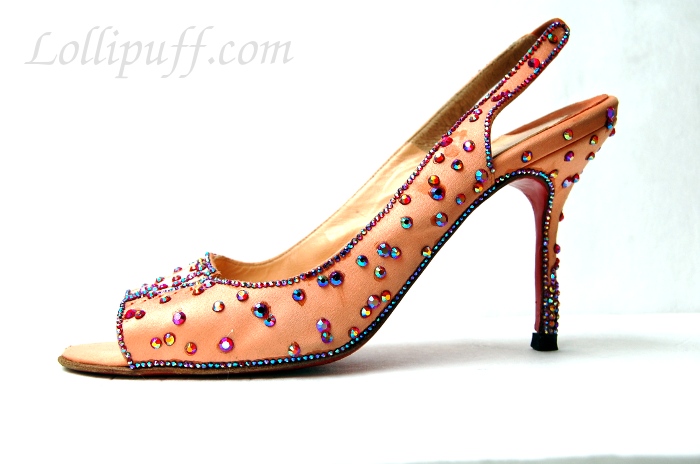
I start my strassing project by outlining the borders of the shoes with the smallest size crystals (SS6). Then, I placed 36 large SS20 crystals on each shoe. 122 SS16 crystals are also placed randomly on each shoe.
Then, after that, just fill in the rest with SS10 and SS6 crystals. About 2000 SS6 crystals and 1500 SS10 crystals were used.
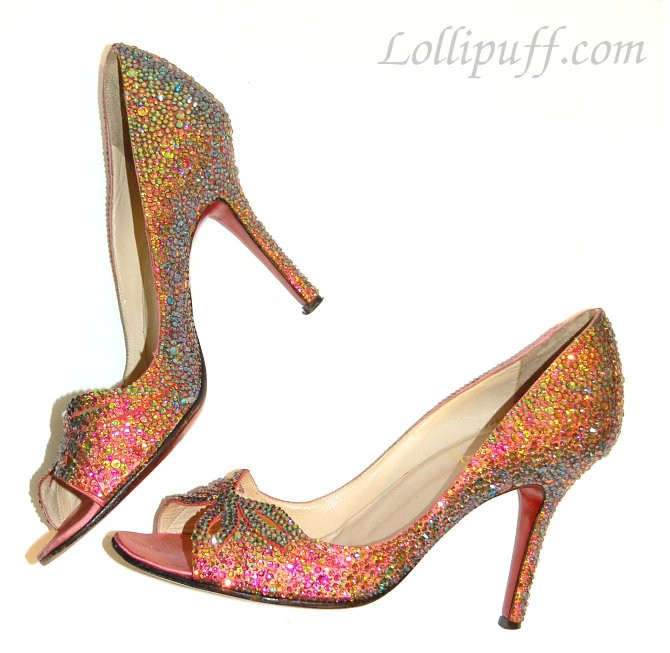
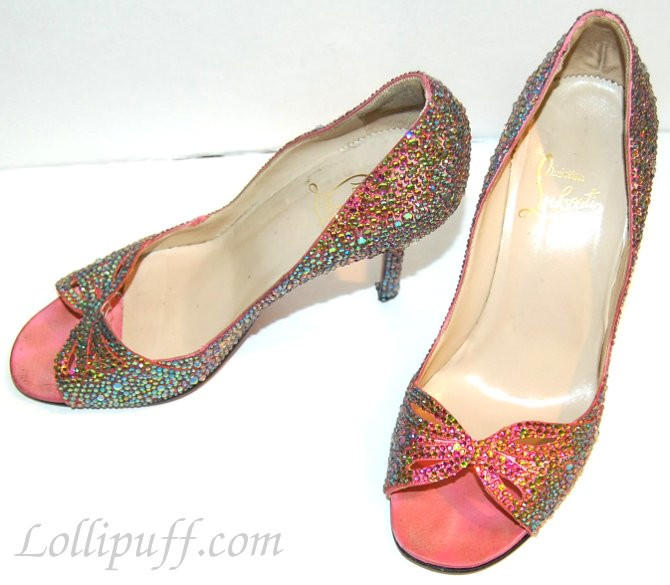
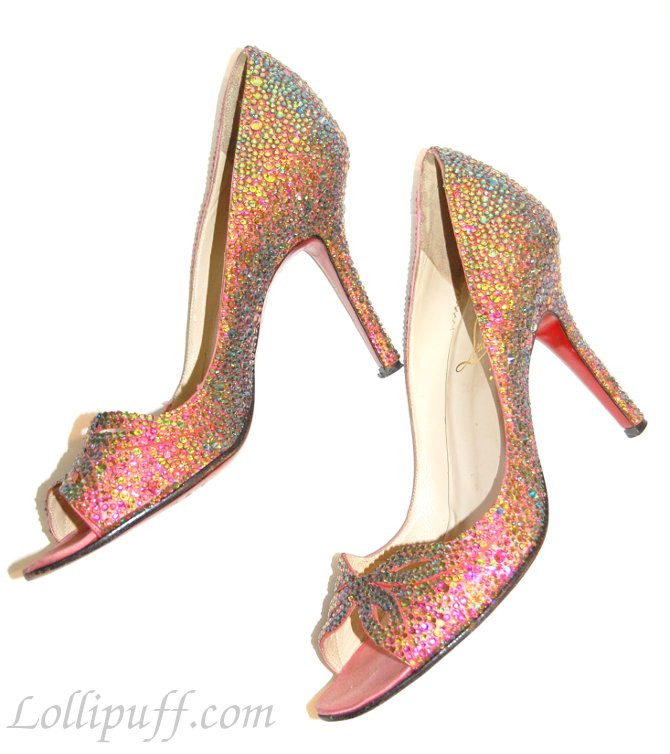
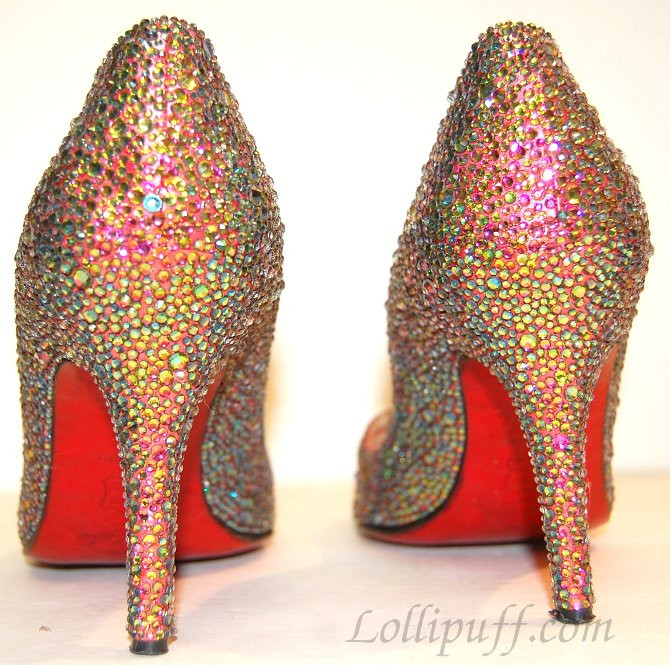
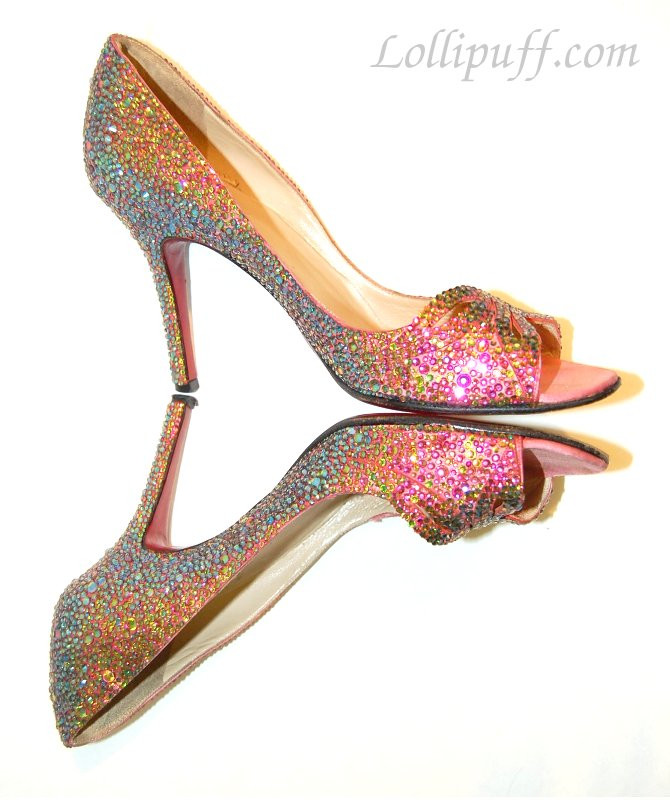
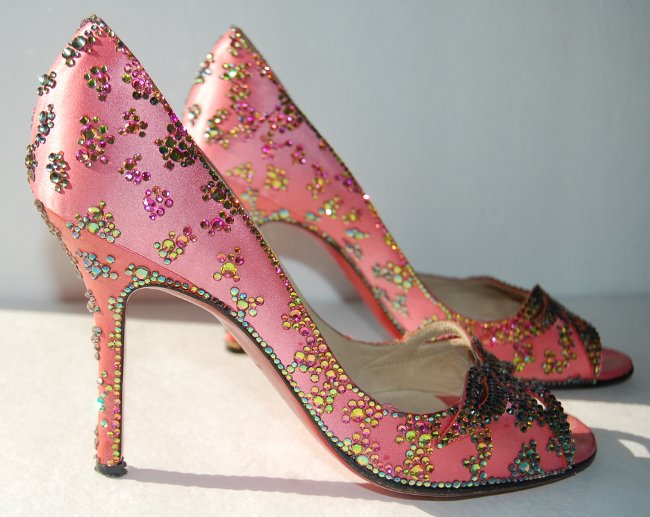
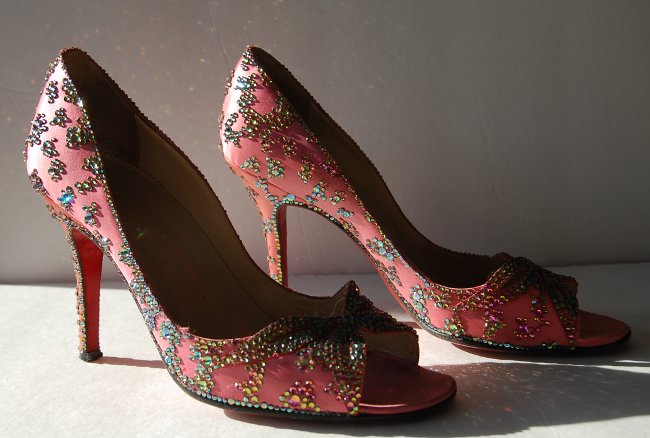
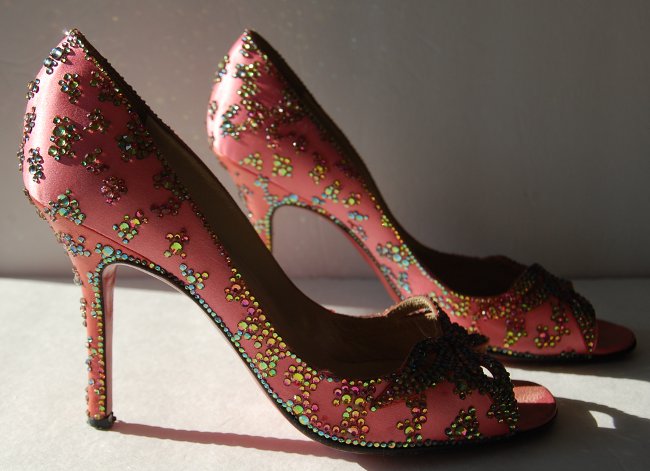
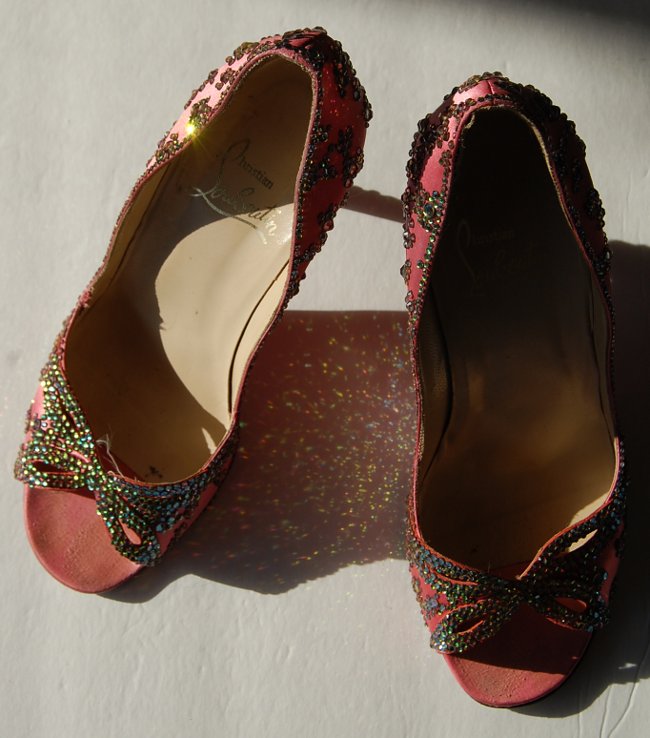
Final Result:

I love the colors that the siam colored AB crystals created!
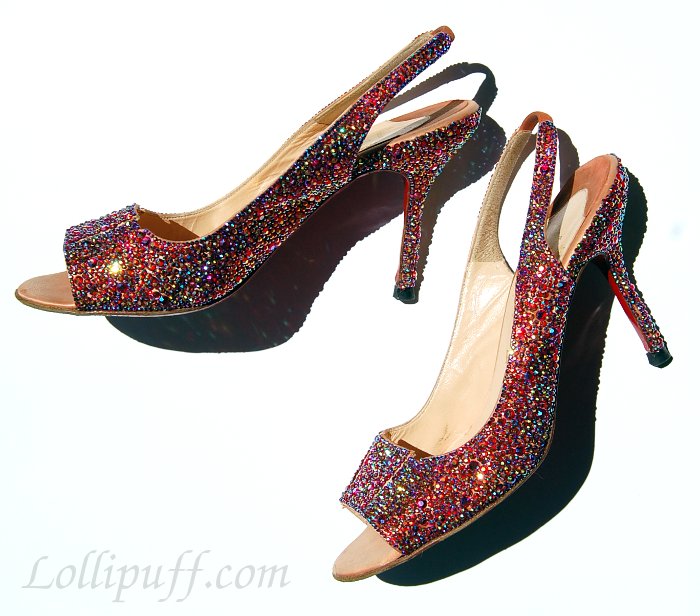
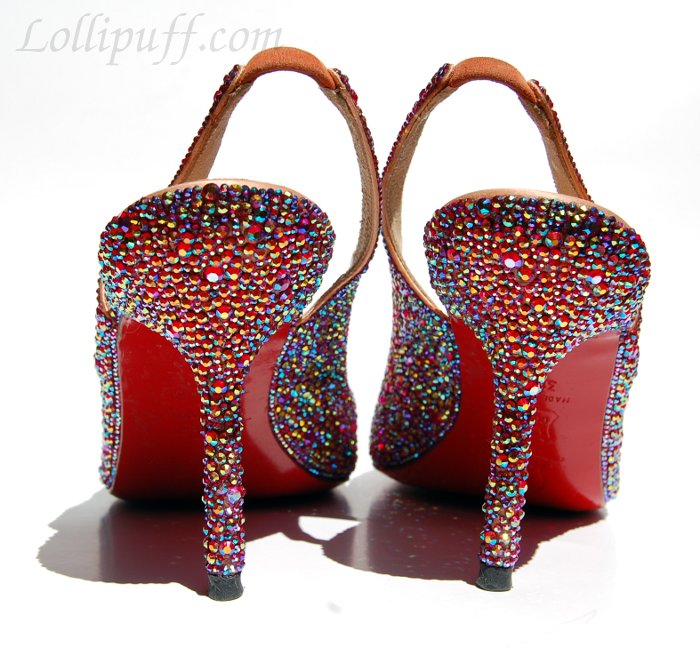
The siam AB crystals sparkle like wild. Because of how much they sparkle, they are too dressy to wear with most outfits! My first Christian Louboutin strassing project utilized crystals that were not as sparkly (but still super sparkly, especially when moving around) and resulted in extremely versatile shoes that match tons of outfits. These shoes are definitely more formal looking!
I loved the results of my first Christian Louboutin heels strassing project so much! Everytime I wear those sparkly pink and green shoes, tons of people remark and compliment them. Surprisingly, these over-the-top shoes have looked fantastic with the simplest of outfits and proved to be very versatile!
My first strassed Louboutins have easily become my most adored shoes. And, since the completion of my first pair, I've been itching to start on my next strassing project. 🙂 This time, the shoes will be a deep red with teal blue tones. Here is the current progress...
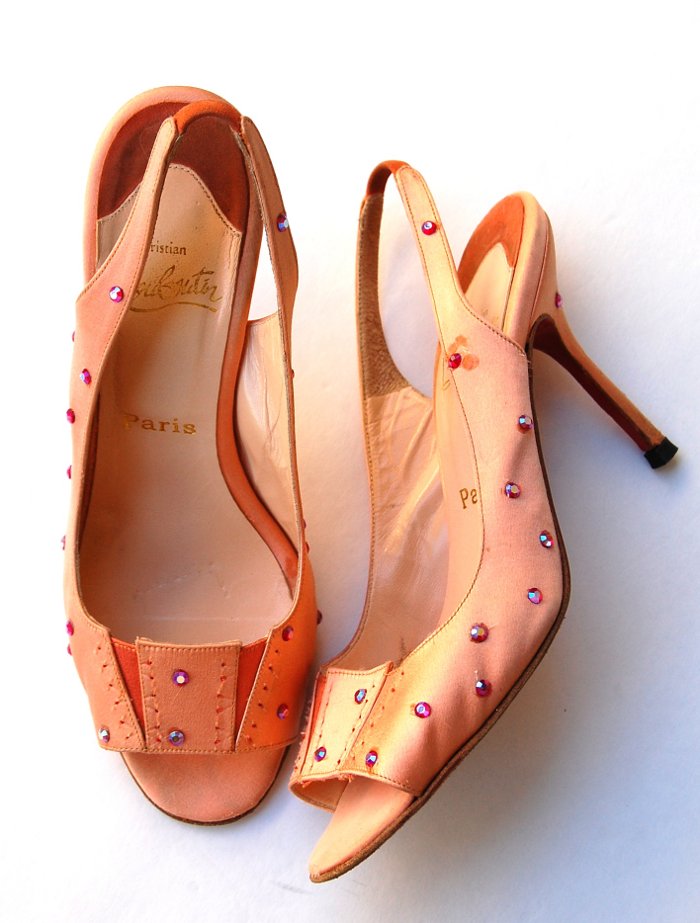
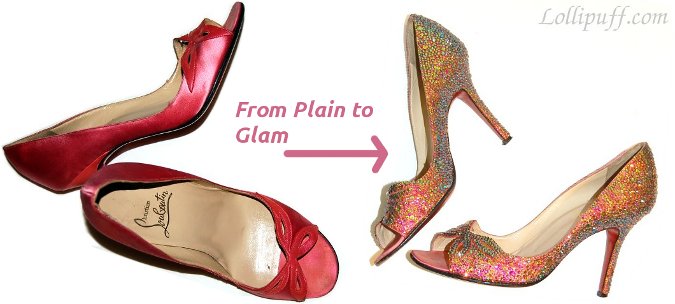
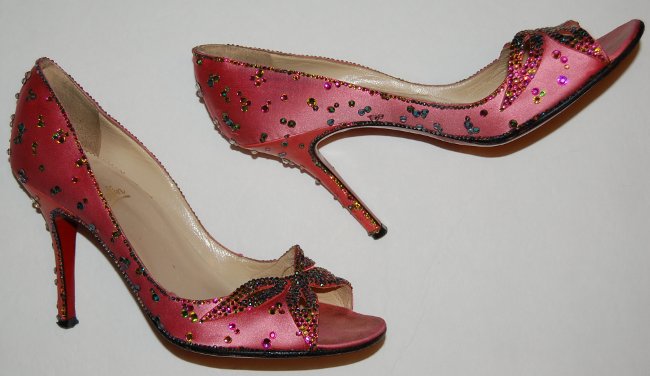
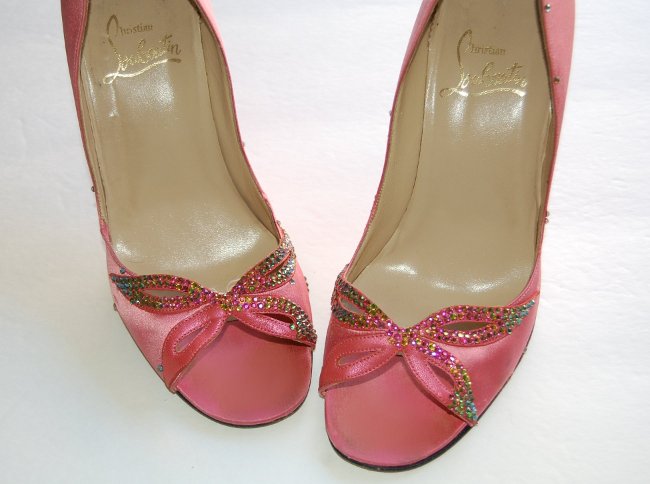
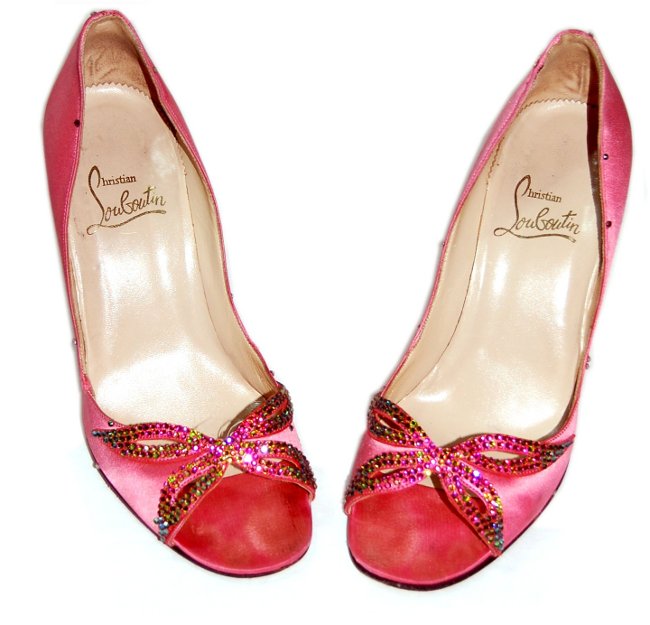
Starting off with plain coral satin Christian Louboutin heels:
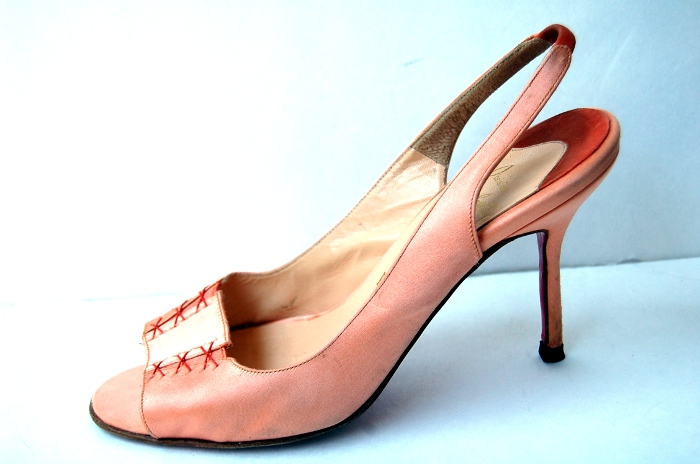
The weird string lacing in the front make the shoe outdated. No worries though, we're giving these shoes a makeover! 🙂
First, I glue my SS20 Swarovski crystals in light siam AB.
The odd string is cut off. Randomly, 36 (72 total) ss20 Swarovski crystals are glued on each shoe.
The different sizes of crystals that will be used.
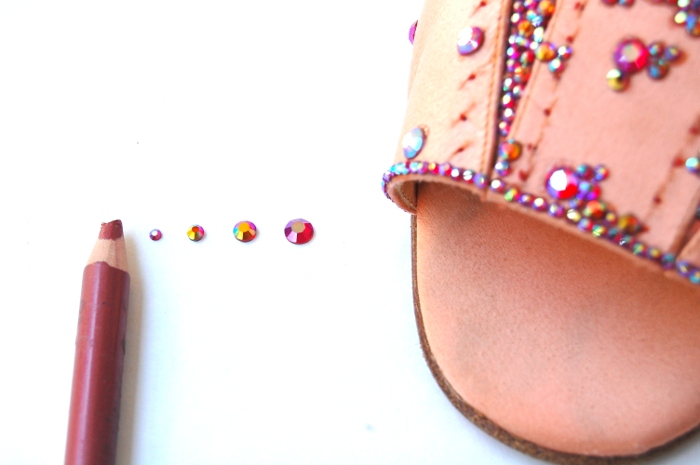
The smallest is SS6 deep red AB DMC crystals. I purchased about 3000 of these tiny little guys. Next up is 3000 SS10 DMC siam AB crystals. We need a lot less of the larger SS16 (288 count) and SS20 crystals (72 count). The SS16 crystals are DMC in light siam AB. The SS20 crystals are swarovski and also in light siam AB color.
Tools that were used:
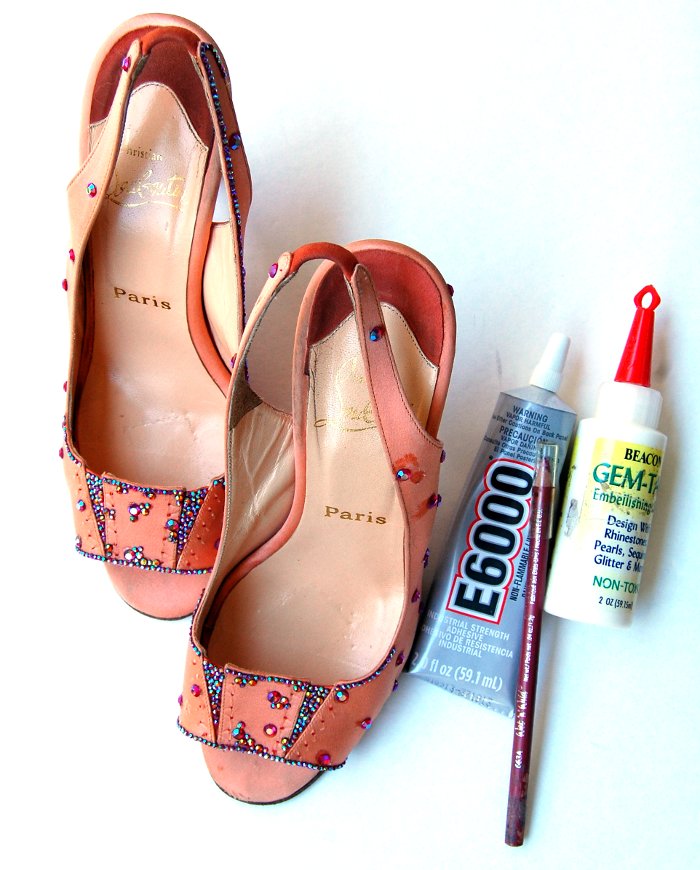
Based on the suggestion of one of our lovely users, I tried out e-6000 glue as it's much stronger. Many people prefer e-6000 over gem-tac due to its strength, and it's definitely more suitable for hard to adhere surfaces like leather or patent leather. However, I found e-6000 to be much messier and harder to work with than gem-tac glue. The worst thing is its toxicity. I didn't feel safe using it unless I was outside where it was well ventilated. Gem-tac is non-toxic and can be used more leisurely. Plus, the gem-tac has held up very well on my first strassing project. For me, I'll stick with satin shoes and gem-tac glue. And, serious props to those who can handle e-6000! That goopy stuff dries so darn fast!
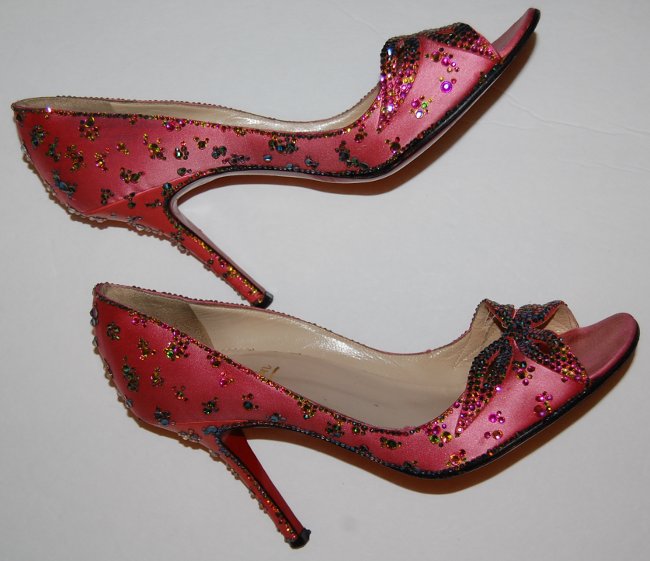
Some teaser pictures until the final result is revealed.
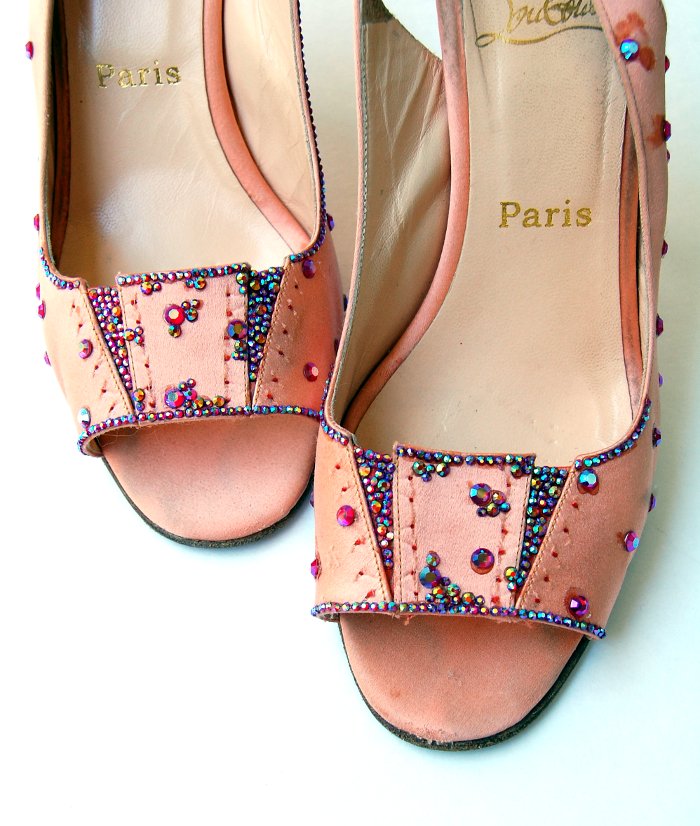
Shoes that are only part way strassed always look a bit strange. But, I seriously think this second strassing project will turn out even more beautiful than the last! This crystal color combination is even more sparkly. The first pair were decorated with light pastel colored crystals. It will be so fun to see how these deep rich red and blue colors turn out!
If you shop last call or pre-owned, you've probably come across a pair of Louboutins with ugly pen or permanent marker writing on the bottom. It's horrible to see those black scribbles that ruin Louboutin's signature red bottom. Before you walk away from that amazingly priced pair of shoes, here's a secret in making that mark go away easily and quickly!
This how-to can be used for removing pen or permanent marker located anywhere on the bottom red sole area of Louboutin heels. It has also been used on new and old versions of Christian Louboutin shoes successfully.
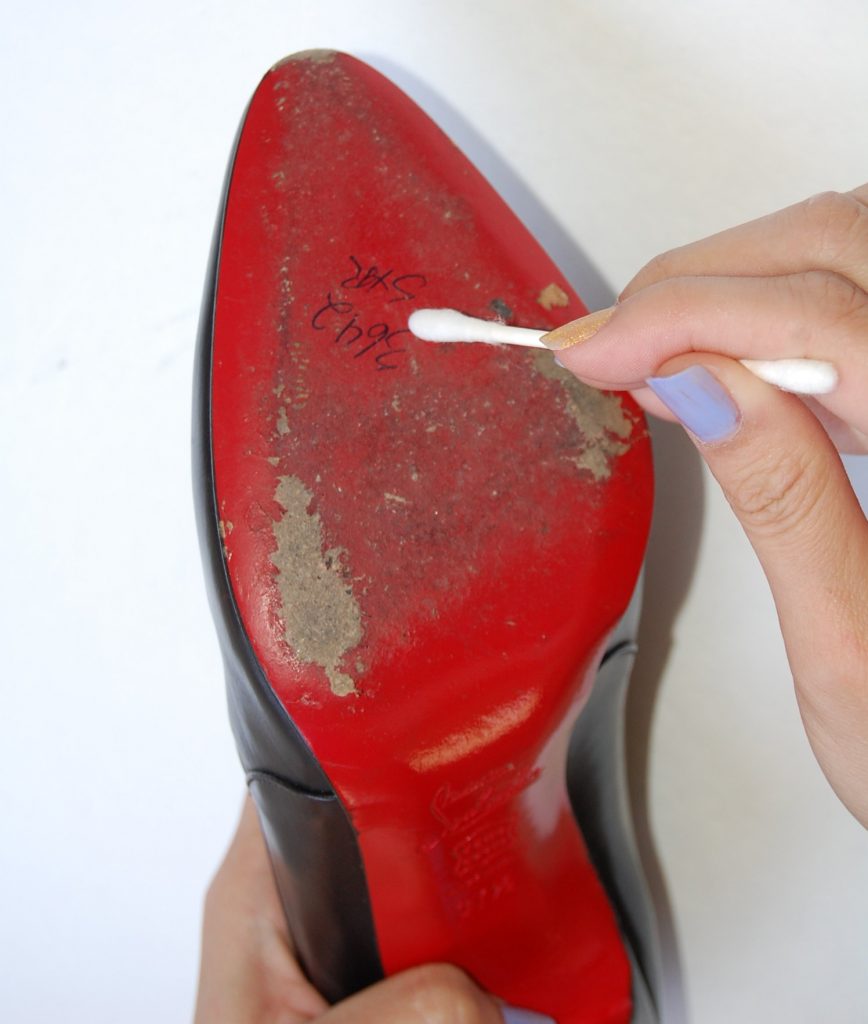
To demonstrate, we'll remove the pen mark at the bottom toe area. Pen marks at the bottom arch are much more obvious and bothersome to a wearer, but unfortunately, we did not have shoes on hand that had this problem.
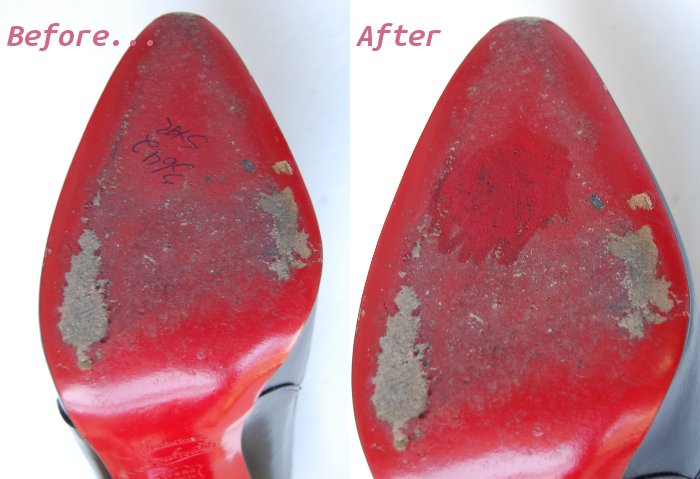
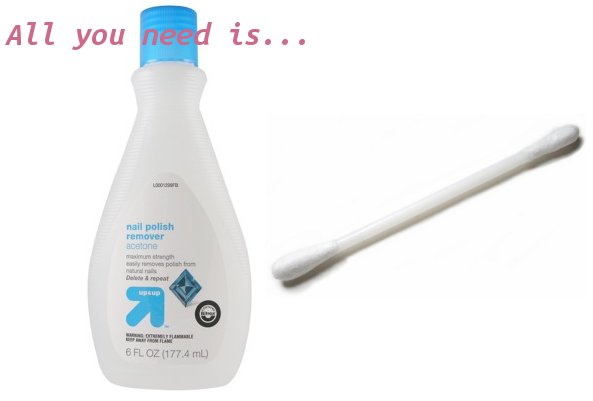
All that's needed is a bottle of acetone nail polish remover and a cotton swab or q-tip.
Wet the cotton with the nail polish remover and wipe the ink from the soles! It really is that easy! The red paint on Louboutins is quite strong and will not be removed if you do not wipe aggressively.
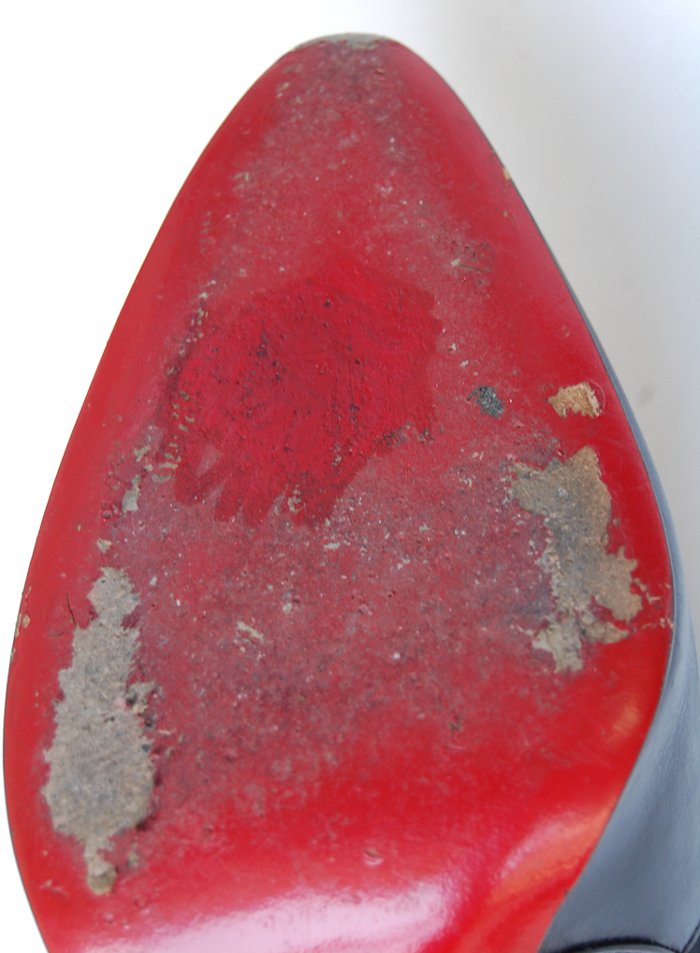
It removed some of the dirt as well from a couple of wears. 😛
Hope this quick tutorial proved to be useful and aids in increasing your beautiful Louboutin collection!
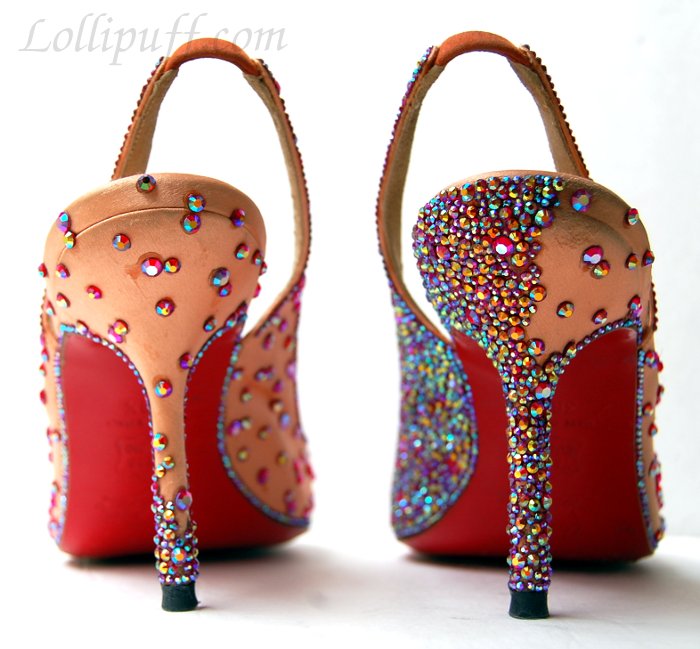
I'm super excited to show you the final result of our Christian Louboutin strassing project! It was definitely a labor of love to get these babies completed. In the end, the size 37.5 shoes required approximately 3600 tiny SS6 crystals, 2400 SS10 crystals, 75 SS20, and 144 SS16 crystals.
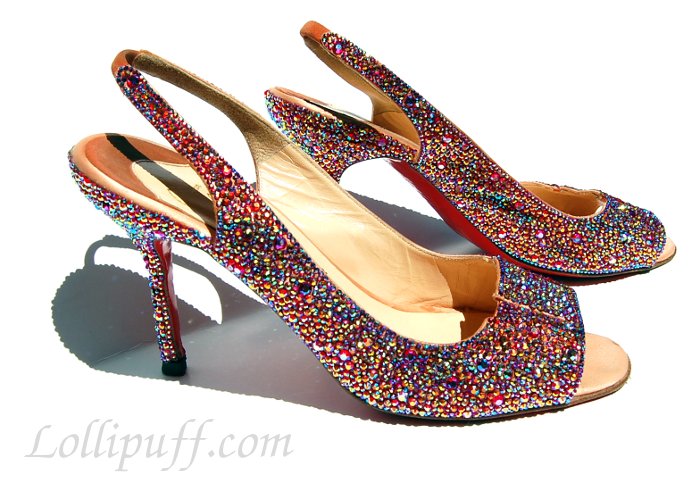
The result was stunning. These shoes glimmer and sparkle so much. The farther away they are the more magical they look. The DMC rainbow vitrail crystals were a fantastic choice. Constantly transforming from blue to green to yellow to pink, it's absolutely mesmerizing. But, enough from me! You be the judge!
Hope you adore the final result as much as we do.
Covering a pair of shoes with small crystals has proven to be even more time consuming than I expected. The good thing is that the process is very therapeutic. When I need to wind down and purge the thoughts in my heads, placing tiny crystals onto a pair of shoes always helps.
After decorating the front bow of the CL shoes, SS16 and SS20 crystals were placed randomly on the shoes. And, SS6 crystals were used to trace the edges of the shoes.
After this, it's just an iterative process of adding more and more smaller SS6 and SS10 crystals in a random way around the larger crystals.
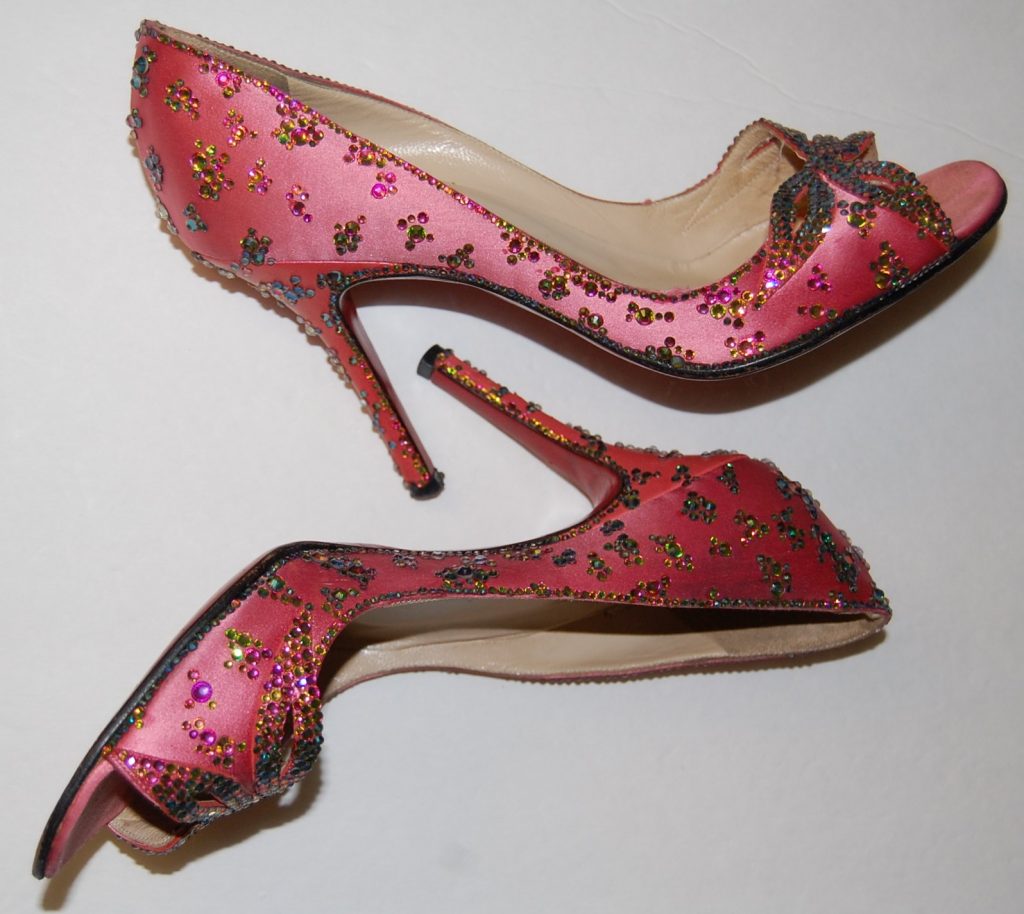
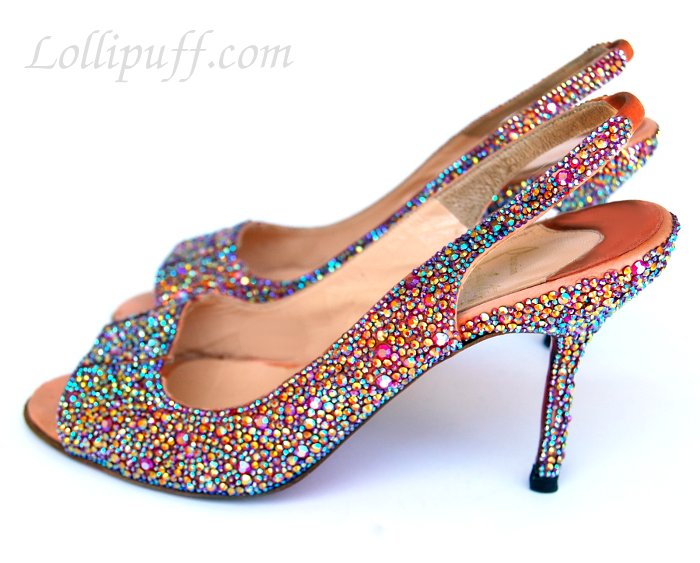
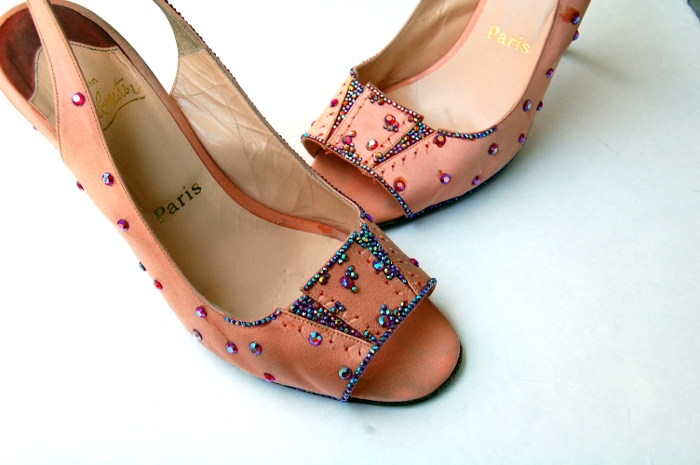
Finally, here's the current status of the Louboutin shoes.
It's amazing how brilliant these shoes are already. These pictures really don't do these shoes justice. I catch myself looking at these shoes all the time across the room. The super sparkle and the way that the colors transform based on the angle is very mesmerizing.
The next update will reveal the final look: fully crystal covered heels!
A pair of swarovski covered Christian Louboutin heels retail for over $3000. So, it's no surprise that a lot of people have covered their own Louboutins with crystals. This process is commonly called strassing. Come take a look at my first strassing adventure! 🙂
Here's the first part of my strassing project. First, I needed to determine which materials were needed. Online, it suggested a pair of craft tweezers (it turned out these were not needed), at least 4 different sizes of crystals, gem-tac (less strong, but non-toxic) or E-6000 (stronger, but toxic) glue, and fabric Louboutin heels (fabric was chosen as I used the weaker non-toxic glue: gem-tac). If you have leather shoes, particularly patent leather, E-6000 glue should be used. Just be sure to work outside due to its toxicity.
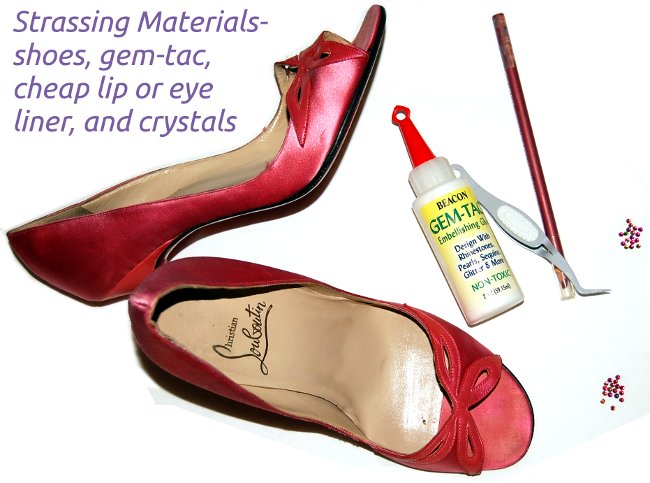
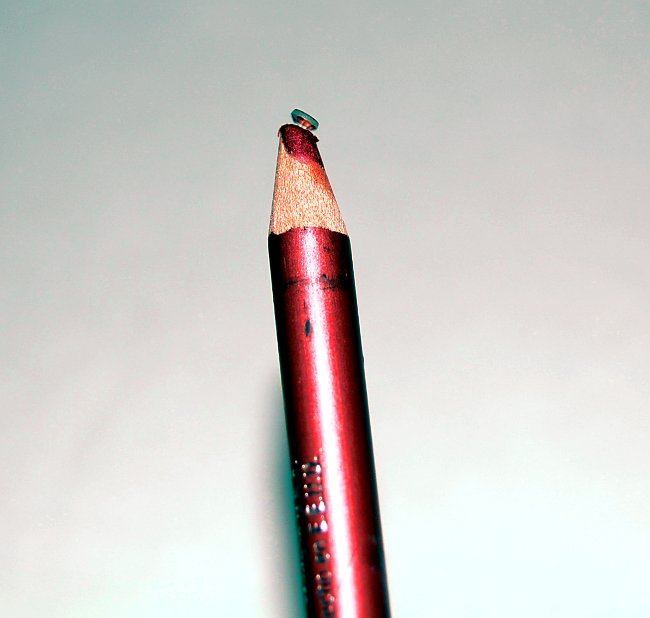
I found out that the tweezers did not work well, even though they are very well made. A cheap eyeliner or lip liner worked much better at picking up and placing crystals. So, you really don't need the tweezers at all!
One of the things that is super important is figuring out how many and what kind of crystals to use. There are several types of crystals to choose from. For covering Louboutin, don't use anything but swarovski or DMC crystals. The highest quality crystals are swarovski due to their sparkle, but they are expensive. The cost of swarovski crystals for a pair of shoes will be around $300. The cost of DMC crystals (slightly less sparkle) costs around $30.
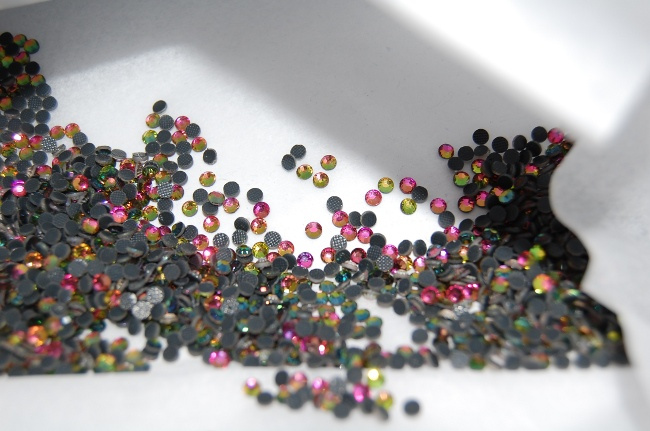
I ordered the following DMC crystals for my project: 75 of the SS20 vitrail rainbow crystals, 144 of the SS16 vitrail rainbow crystals, 4320 of the SS10 vitrail rainbow crystals, and 4320 of the SS6 vitrail rainbow crystals. SS refers to the size. Vitrail means that the crystals change color depending on the angle of the crystal.
My SS10 DMC crystals:
The easiest and fastest way of transferring crystals to the shoe, is to directly apply a few small dots of glue onto the shoe, and then placing the crystals on top. I started the project by applying SS10 crystals to the butterfly pattern on the front of the shoe. ***UPDATE*** Be liberal with the glue. I learned through experience that the glue dries completely clear, and these little dots of glue are not as good as more glue spread around to make a thin layer across the entire surface.
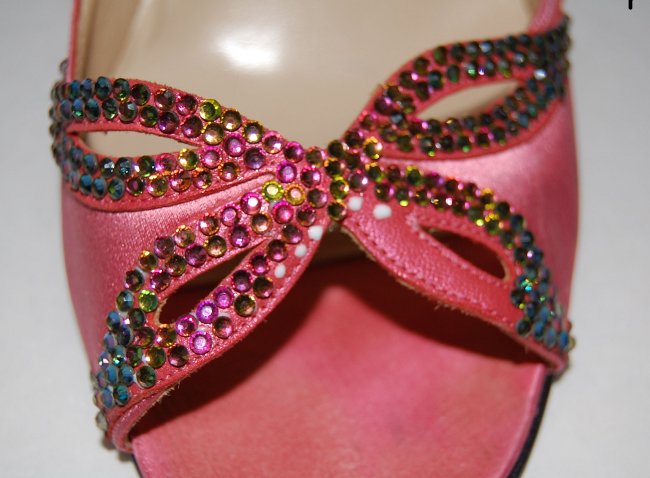
Though it may not look like much, placing the SS10 crystals to the bow area took a couple of hours. Later, I place additional smaller SS6 crystals on the butterfly pattern to complete just the butterfly area. Here it is with just SS10 crystals.
The crystals really look different depending on the lighting!
I hope you enjoyed this first look into my new adventure! As my project progresses, I'll update you all on how it goes! Hope that these shoes turn out pretty. I already know they will be super sparkly. 🙂
Many fake Christian Louboutin shoes are quite easy to spot! Here's a beginner's guide of some of the most common characteristics of counterfeit shoes. Don't end up with a fake! They're very uncomfortable, lower quality (won't last as long), and not nearly as gorgeous as the real thing!
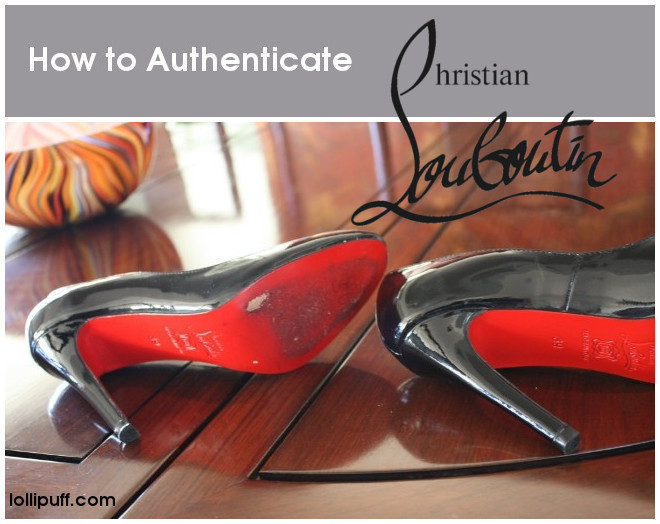
I've collected a number of pictures from eBay to show what some fakes may look like. We'll go through different features of the shoe, so you can get an idea of how to authenticate Louboutin.
Red Sole
Many fakes do not copy the red sole very well at all. A true Christian Louboutin sole is made of leather painted a bright glossy vibrant shade of red. As a result, the look is very recognizable and unique. Many fakes have plastic or some other resin bottom. Take a look at the red soles below. They are all from counterfeit shoes.

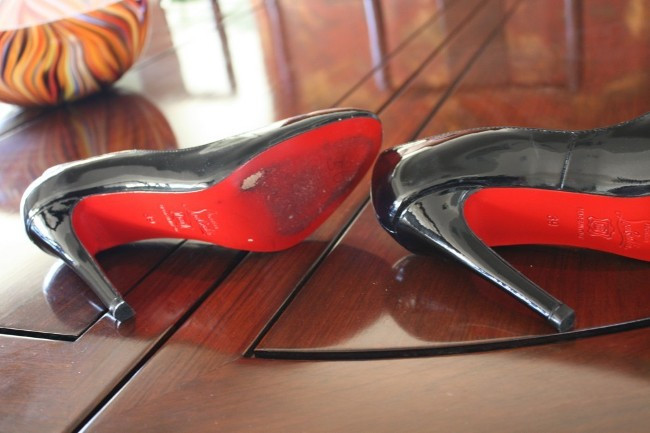
Please note that when authenticating any item, it's not good practice to only look at one aspect of the item. I have seen fakes with somewhat convincing bottoms, especially when pictures are taken in less than ideal lighting. So, let's take a look at some of the other features.
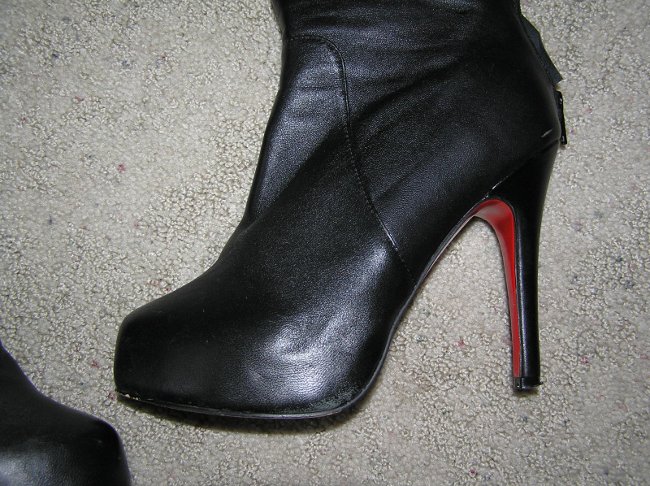
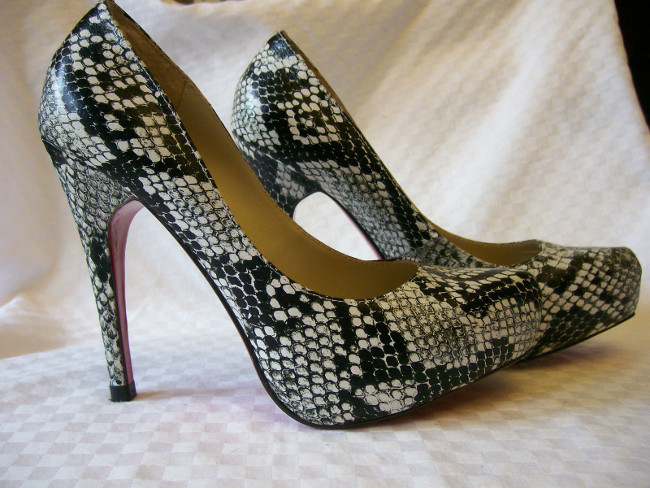
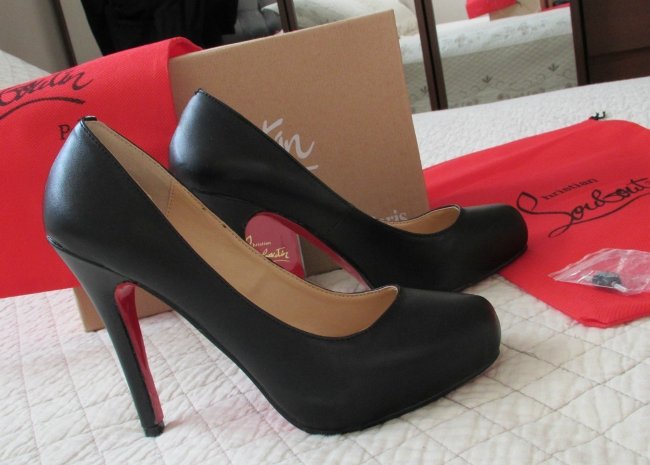
Shape and Design
Notice how clunky and bulky these shoes look? Large toe boxes, high vamp, wide shoe bodies and less than elegant slopes for the heel are not common for Christian Louboutin's designs.
Bad Quality
The quality of the shoe is a dead giveaway. If the studs, glitter, sequins, etc are less than perfect, it's a very good chance that it's a fake! Take a look at how awful the bedazzle is on these counterfeits!

Please note the jagged cutting on this shoe:
Please note the asymmetry of the toe boxes
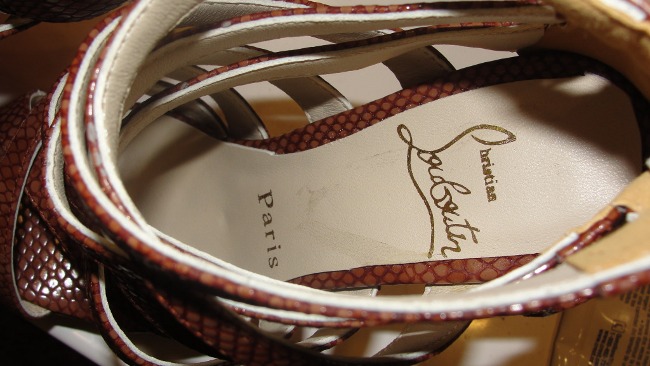
Accessories
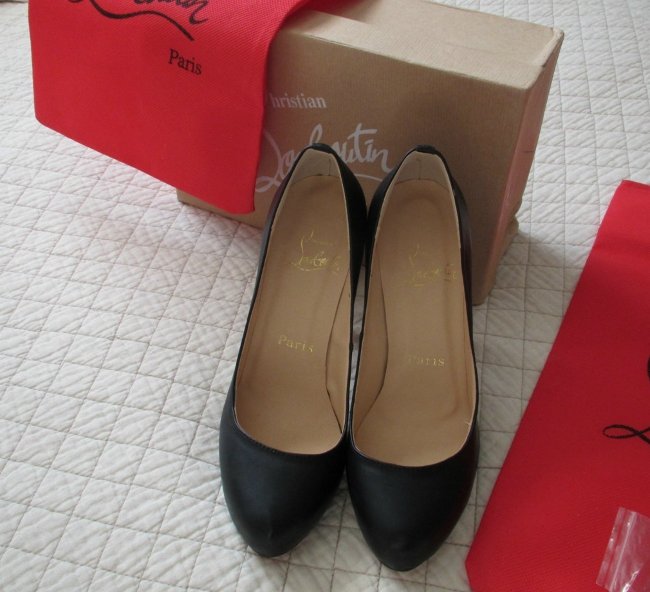
Authentic Christian Louboutin can come with 1 or 2 shoe bags, a small mini shoebag containing heel taps, and wrapping and shoe stuffing. All these are held in a hard cardboard beige Christian Louboutin box. It should not come with a card, and shoe tips are not in a little plastic baggy.
As you can see in this picture, there is a card behind the shoes. Also, you can see the plastic bag with heel taps.
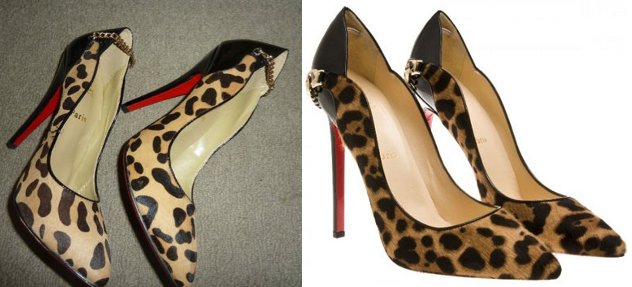
Style
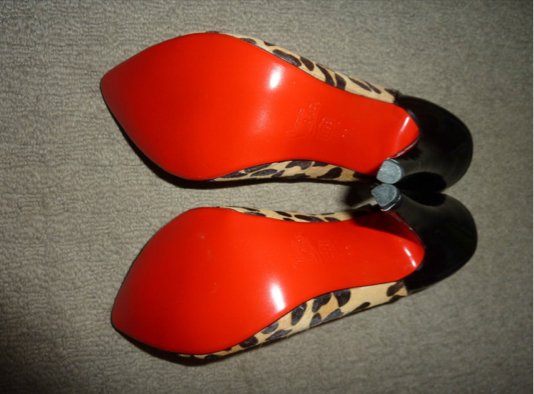
Finally, it's great to familiarize oneself with the different styles of Christian Louboutin.
Right below is the Christian Louboutin Dorepi in leopard print. Notice the differences between the fake and the real? Real is on the right side. It's pretty drastic!
Authenticating Louboutin is much easier than authenticating most other brands like Prada, Gucci, Chanel, Louis Vuitton, etc.
We hope that these basic authenticating tips on Christian Louboutin will help you out!